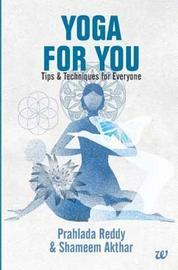
 Yoga for You, Tips & Techniques for Everyone by Prahlada Reddy, head of Toronto's Sivananda Yoga Vedanta Center and Shameem Akhtar, acclaimed Mumbai-based yoga instructor, is a book for yoga aficionados that covers a range of poses and in-depth advice for practicioners.
By way of an excerpt, we bring you part of Chapter 1:
Sirsasana (Headstand)
This is one of the most exciting poses, both to teach and learn oneself. In fact, learning it pins one's discipline on the mat more firmly. That is why, unless the practitioner has a health issue for which headstand is contraindicated (see below), this pose must be taught. Also unlike other poses which may be taken for granted with practice, this pose continues to be a challenge even when mastered the student is led into increasing the duration in the pose, adding variations of it which challenge other muscle groups, even learning different ways of entering the pose. All of this ensures that the student' time on the mat is never boring.
***
Since this pose puts a lot of physical pressure on us, leads to a blood gush in the brain, and has a direct impact on the nervous system, it is believed to relieve us of anxiety and negativity. No wonder the headstand is celebrated as the king of all poses!
***
Method
-- To do the headstand, kneel on the ground, cup your hands at the elbows, the thumb and index finger of each hand flaring over the inner elbow of the opposite arm.
-- Place the locked elbows on the mat.
-- Open the hands, interlocking the fingers to form a cup with both hands. This creates the tripod, on which you will be raising yourself. The elbows should be firmly on the mat.
-- Place the head now carefully at the hands. It is important to note how you place your head. If it is too high on the hands, your head will wobble. You must place it just so, with the top edge of the forehead at the little fingers. Some beginners may also feel extreme discomfort at the little fingers, but this disappears with practice in a few weeks. Place the head just off the little fingers. Those nervous about being distracted by the potential pain or precision required may practice the first stage for a few days/weeks till the hands and fingers get acclimatized to the pressure. The placement of the fingers at the forehead (not under it) will also prevent this pain.
-- Raise your hips. Raise the knees off the ground, to walk your feet towards the hands.
-- Ensure the elbows do not move. If you have unconsciously shifted your elbows, cup your hands once more, as before, to settle down. This is very important since the triangle you create with your hands and elbows creates the perfect base on which to place your body weight. If the elbows flare out too much, or have moved too close, the foundation for your headstand will be very shaky! Any movement from the elbows when you are up in the headstand will cause you a fall.
-- Keep walking the feet to the head till you reach the point where the hip is pointed up and the back is curved. You must walk till the hips are almost over the shoulders.
-- Fold one leg at the knee, holding it to your chest.
-- Fold the other leg at the knee. This is the most important stage in the headstand. If you are a beginner, you will find it irresistible to jump up into the pose directly, without this fold. The instructor must discourage the student from that urge, since that mistake will also mean the back muscles and the neck will never learn to fold and lift the legs up. This is a learned technique and worth the time you invest in it. Also those who move up with a jump are creating the ideal condition for a fall.
-- Hold the folded knees to chest. This should be held confidently. This is the next most important stage while going up.
-- Move the heels back towards hips. This opens the knees, moving them away from the chest. At this point ensure the feet do not move too far back, over the hips.
-- Gently open the legs, straightening them over the torso.
-- The body must be in one line, the legs over the shoulders, with no curve at the spine once you are up. The feet, the hip bones and the shoulders are aligned in one straight line. A curved spine, often an issue with beginners and even with advanced students, strains the neck and lower back substantially. Unfortunately many people learn to hold the headstand with strength. And may continue doing it for years. Actually, a good headstand is a light pose, and held with focus more than strength.
-- If attempting for the first time, hold for just a few seconds. Ensure that the feet are not falling loosely or too tight. Focusing on keeping the knees straight will help you accomplish this feat to some extent. Keep the legs together.
-- To come down from the pose, fold the legs at the knees, drawing them to the chest.
-- Then gently, with control, lower one foot at a time to the ground. Advanced students can lower both feet down to the ground. If beginners wish to drop both feet down, sometimes out of nervousness they drop the knees down instead. This can be extremely painful. So it is best to practise one foot at a time to control this nervous descent.
-- Rest in the baby pose for a while.
-- Sit up, and do a few neck rolls to relieve any strain at the upper back or neck.
Contraindications
-- Students with very high blood pressure should avoid this pose. If the blood pressure is brought under control through regular yoga practice within a few weeks or months -- as is likely -- one may attempt the pose.
-- Those suffering from severe circulatory system disorders, including heart problems, should avoid the headstand.
-- This pose is not recommended during menstruation.
-- It must also be avoided during severe toxic conditions like constipation, since the pose can be counterproductive, pushing the toxins back into the body.
-- The headstand must be discouraged for those with severe eye problems like retinal detachment and glaucoma.
-- Since beginners tend to shift the weight wrongly on the neck, ideally they must also not attempt this pose if suffering from neck issues, including cervical spondylosis. Again, if the problem has been brought under control after a few weeks or months through yoga sadhana and a medical examination clears the student, the pose may be attempted.
-- Since this is a heating practice, one must avoid it if unwell, or suffering from inflammatory conditions, including fever, or infections, especially in the ear. Remember, the headstand pushes bodily stuff inwards, so it must not be attempted if there are infections or toxic conditions which should be eliminated first.
-- Though there may be a sense of eagerness to try this over other poses, one must practice the other therapeutic poses, get all physical problems under control, and phase learning so the body to gets used to yogic asanas before attempting this pose.
Fine Corrections
The headstand is a pose with a long learning curve. It can be constantly fine-tuned. After the initial disorientation is dealt with, finer corrections must be made to ensure that one is able to extend the duration of the pose.
-- A good headstand must feel light and strong.
-- You must float up into it, rather than jump into it, even if learning this muscular effort takes longer.
-- When you walk your feet towards the head, feel your back curve, push down the elbows, firming up the base.
-- Keep the legs straight when you walk ahead. This will ensure that the hips rise up properly.
-- When you fold the knees, ensure the knees are close to the chest. This accentuates the curve. If you're a beginner, you might resist this due to the pressure you feel at the neck. But if this stage is not learnt properly, you will open the legs off the centre, in the front.
-- Moving the heels to the hips will release the legs, unfold them and make it easier to straighten up. The neck and elbows are substantially involved in the lift, so keep your focus on the elbows, and the upper back will automatically help you go up smoothly.
-- In a good headstand, even if you are heavy at the waist, the stomach will naturally cave in. If your stomach is popping out, chances are you have wrongly transferred the weight to your neck or your lower back.
-- Always give the class or yourself simple cues. Stick to the technique instead of theorising about it. While questions must always be encouraged, talking of poses in the abstract will not get one very far!
-- If you feel that you have lost balance, always give yourself just one cue while you fall - feet. This way, whether you fall forwards or backwards, your knee, back and neck will be protected. If the feet fall ahead, you protect the vulnerable knees. If the feet fall behind, the upper back will automatically lift off the ground, protecting the entire spine and neck.
-- You can also roll down by curving the back. But this is not something that can be consciously controlled!
-- Most beginners believe that the headstand should be rigidly held. Au contraire, it is a pose where you experience a slight sway as the body moves lightly with the breath. If you hold the headstand rigidly, the body will become heavy and your muscles will fatigue quickly, bringing you down sooner than you'd like.
-- Because of the slight sway mentioned above, beginners tend to hold the breath. Remember not to stop breathing while holding the pose. If you accept that the sway is felt and accentuated when you breathe, and learn to focus on each inhalation and exhalation, with time you begin breathing normally. The breath in turn powers muscles which are getting stronger as they learn to hold on against gravity.
-- Clearly, the mind must constantly watch and correct itself during the asana. The pose therefore can sharpen focus and make you rested yet alert - the perfect meditative state.
-- Do not stiffen the legs, or they will feel heavy very soon. Keep the feet pointing up, but hold the legs with elastic firmness, instead of contracting them rigidly. Ensure the legs don't flare. Most beginners mistake elasticity for looseness.
-- Some beginners may also have a discomforting sense that their feet are cold. This is because of the blood leaving the legs and shifting to the torso, the heart and the brain. You must phase the learning till the blood flows naturally in the headstand. It is possible, if your feet feel cold, that you are pushing yourself over the limit with just one pose.
-- Always be aware of when you become tired. Since this pose also stresses the heart (in a good way) you must allow your heart to acclimatize itself to the pose gently with regular practice.
-- Always exit this pose (and other poses) the way you entered it fold the legs back to the chest before gently dropping the feet back to the ground.
-- If you are a beginner, do not shut your eyes while in the pose, since you may not be clued into when your hips have shifted back, or if you are about to fall. This fall could be a rather nasty shock and create inhibitions.
-- Stick to the technique, even if it may take longer to complete the pose. Mistakes learnt by the body are most difficult to dislodge. Moreover, entering the headstand carelessly can create problems with its advanced variations as well as spawn postural defects.
Excerpted with the permission of the authors from Yoga For You, Tips and Techniques for Everyone (Rs 250) by Prahlada Reddy and Shameem Akthar, published by Westland Ltd.
Click here to buy the book!